Wind Turbine Research
RESIDENTIAL WIND TURBINES, 2020 - 2023. Updated 25th May 2023
Overview
Having been through the process of setting up and testing solar PV, I was keen to see if a wind turbine was feasible and what the costs would be. Living in the Wellington, New Zealand, area increases the chances of sustained wind flow.
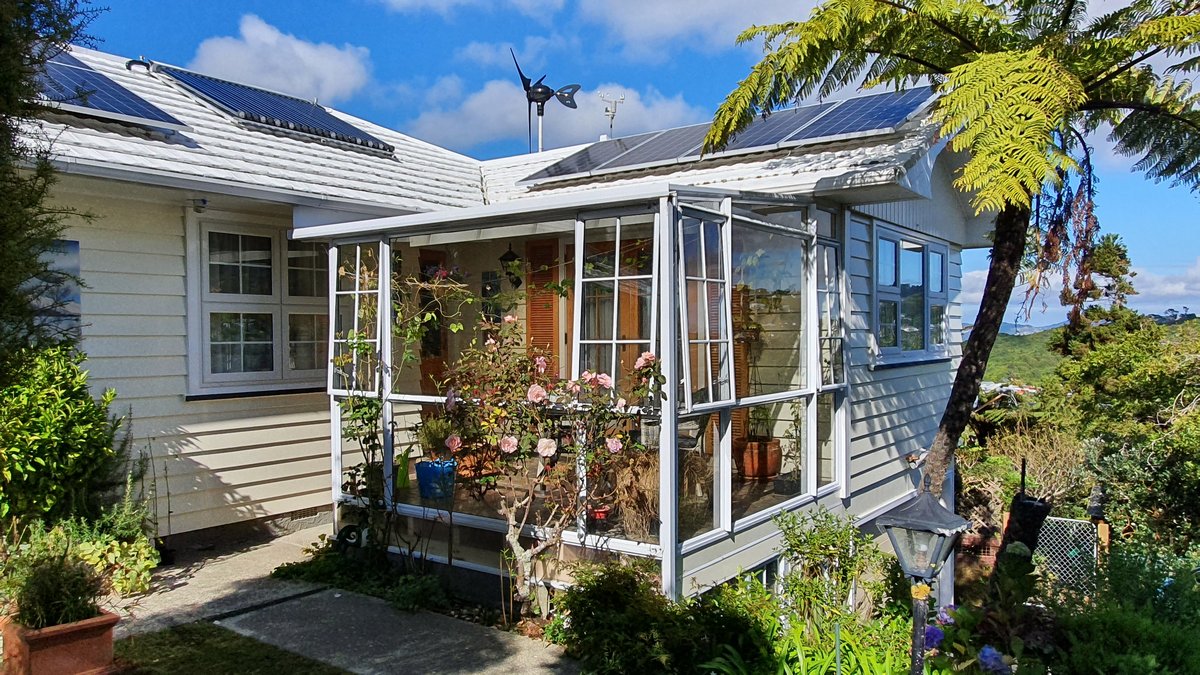
Whilst a number of these smaller wind turbines have been set up in rural areas, very few have been trialed in residential areas. I wanted to roof mount mine, instead of a tall pole, so it didn't block my neighbours' views.
You need to have consent from your local Council and, as one of the first to do this, I needed to take one step at a time. From initial Council meetings, to the system up and running took over a year! Covid 19 also delayed this process by several months.
A word of warning: Whilst people were happy to sell me parts of the wind turbine system, some didn't know anything about their product. They were also unwilling or unable to refer me to people who did know how these systems work together. This was very evident with the wind turbine and the inverter. To also complicate matters, I already have a Tesla Powerwall 2 battery storage system and solar PV installed.
To keep things simple, the wind turbine was only connected to our lighting circuits.
I have documented the process, so others don't have to re-invent the wheel, but remember Councils throughout NZ have different procedures and requirements. Many will not have had a request to install a residential turbine.
Initial Research
Readings from a weather station mounted on my roof at the same place as the proposed wind turbine, showed usable energy flowing over the ridgeline in the previous four years. The Aercus Instruments weather station I use, can record in .csv format every 10 minutes. Save this data regularly, because if the battery goes flat, you will lose the data! 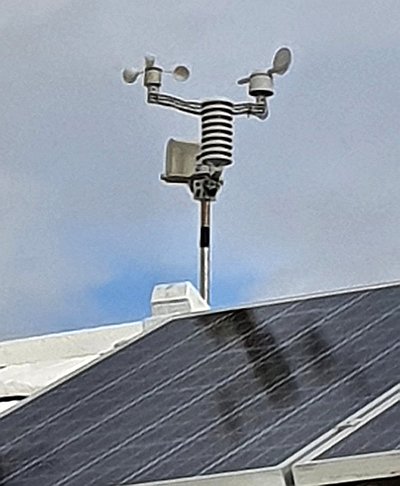
August 2021: I replaced this weather station as the wind cup part kept failing. Now running a much more reliable Weatherflow Tempest system which has no moving parts.
November 2023: The second wind turbine ran well for several months, and then dropped to 10% of its output. (Same problem as the first one). So I returned the unit for a full refund.
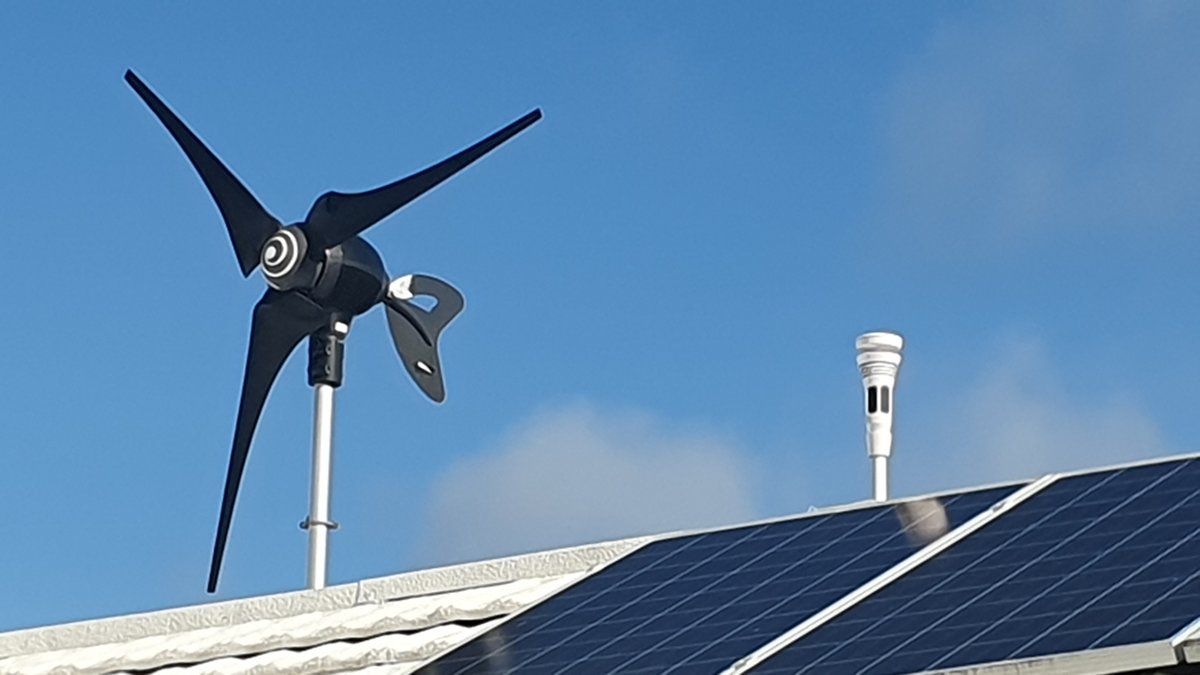
WIND TURBINE: I purchased a 2kW turbine from Jaycar (MG4552) as I feel 2 kW is the minimum output for the cost and time involved to have it approved and installed. Jaycar also supply spare parts for these units. This turbine starts spinning in light winds but only starts generating power from 3 metres per second (m/s) around 10 kph. The manufacturer claims it generates 2 kW at 20 m/s (72 kph) and can survive 50 m/s (180 kph).

Weather station data over four years, has shown that the wind over my house has never exceeded 100 kph.
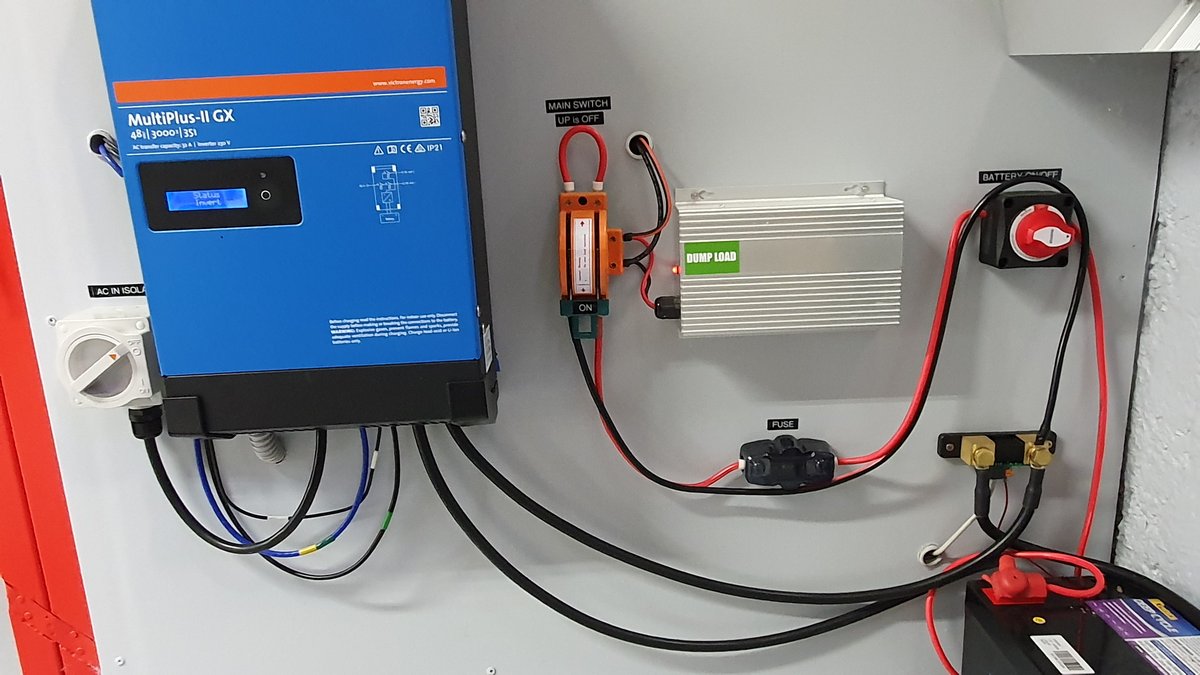
INVERTER: You need an inverter to convert the turbine's 48 volts DC to 230 volts AC, and a 48 volt battery pack for storage. An electrician needs to wire all this up.
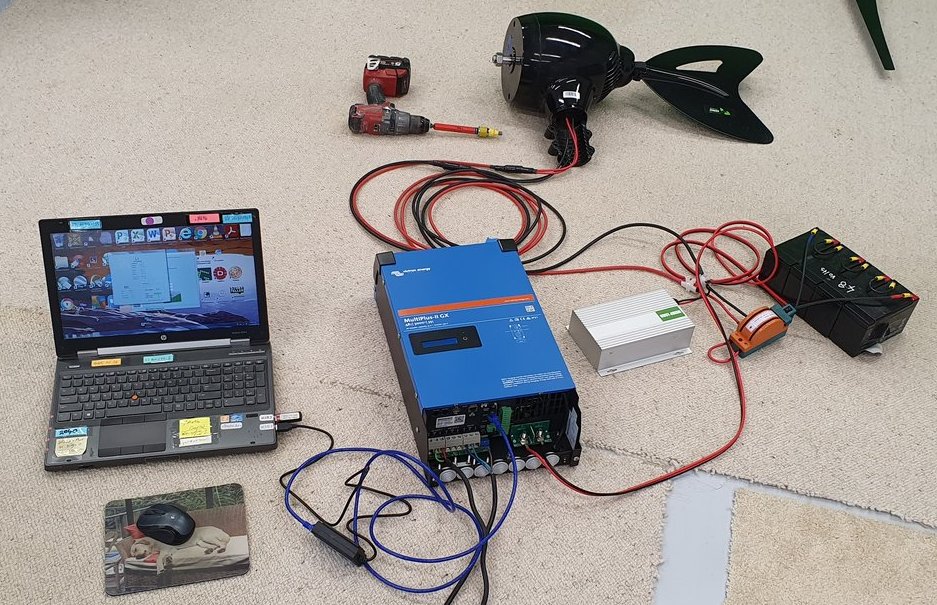
It took months to find a suitable inverter and the local supplier, AEP Pacific, knew very little about setting these units up. The inverter was a Victron Energy Multiplus 2 GX 48/3000/35.
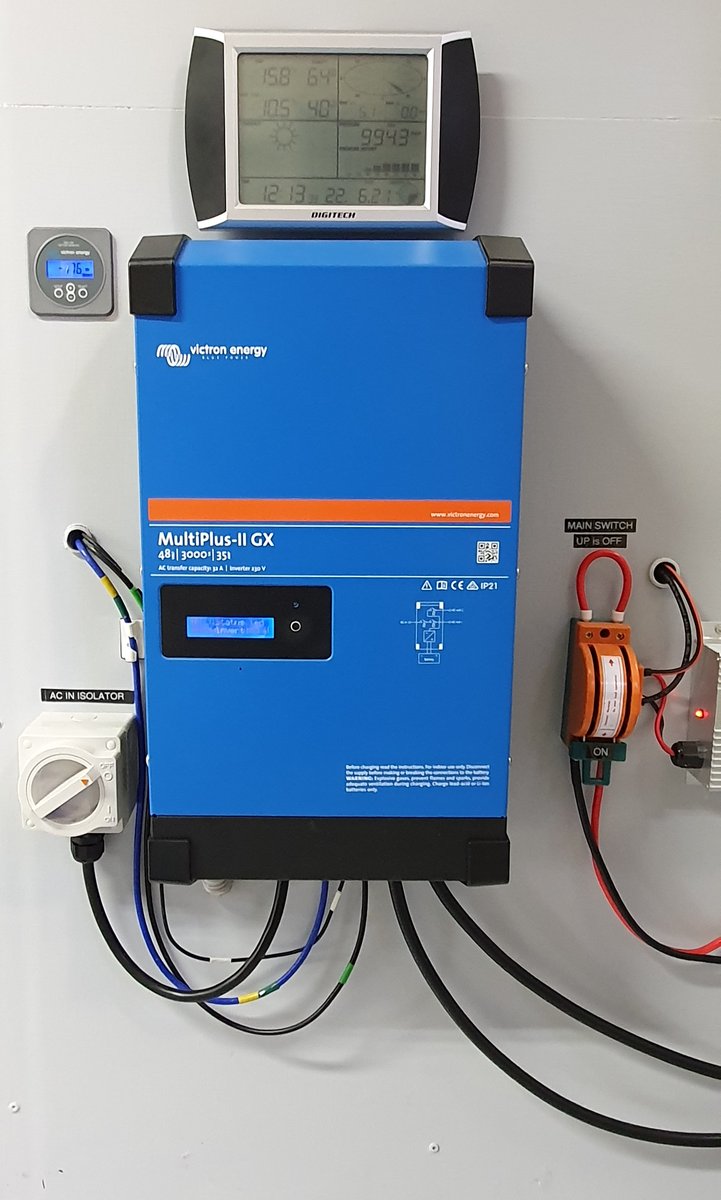
I would strongly recommend you pay to have an experienced installer to assist with the hardware and software settings, - good luck finding one!
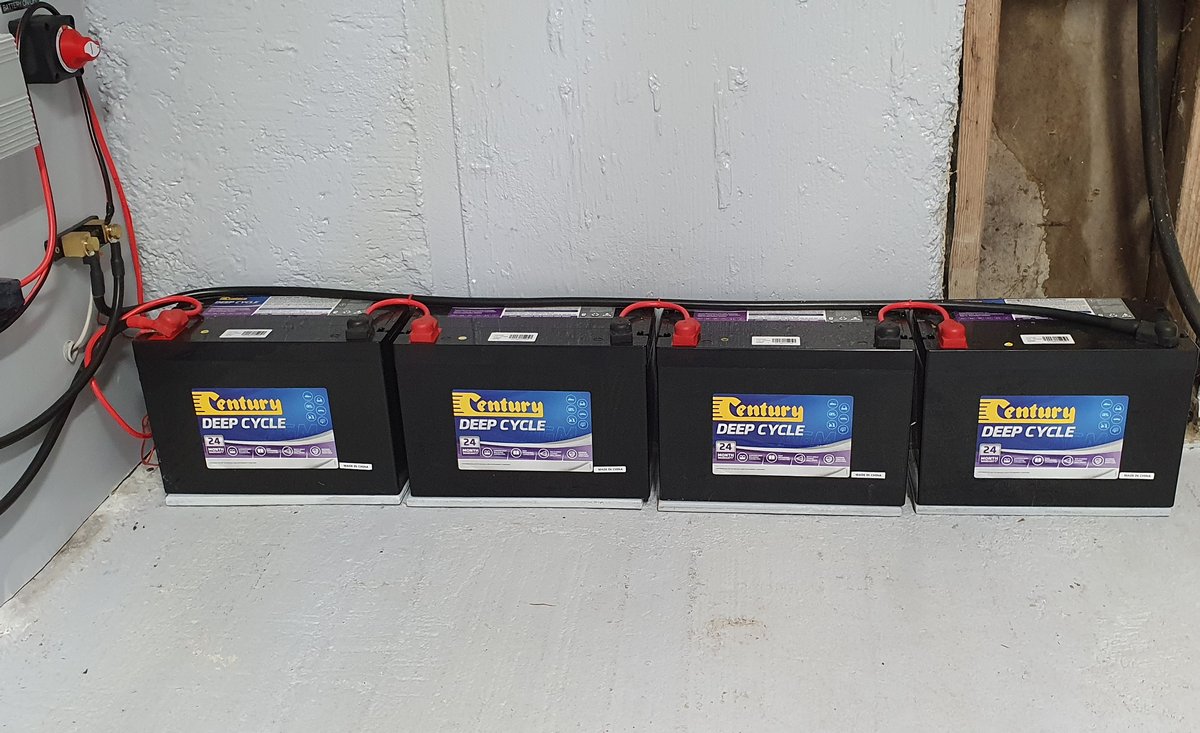
BATTERY PACK: I purchased four 12 volt, deep discharge AGM batteries from The Battery Shop. These are 105 aH units wired in series for the 48 volts needed. If you are planning this system for off-grid use, you will need more batteries!
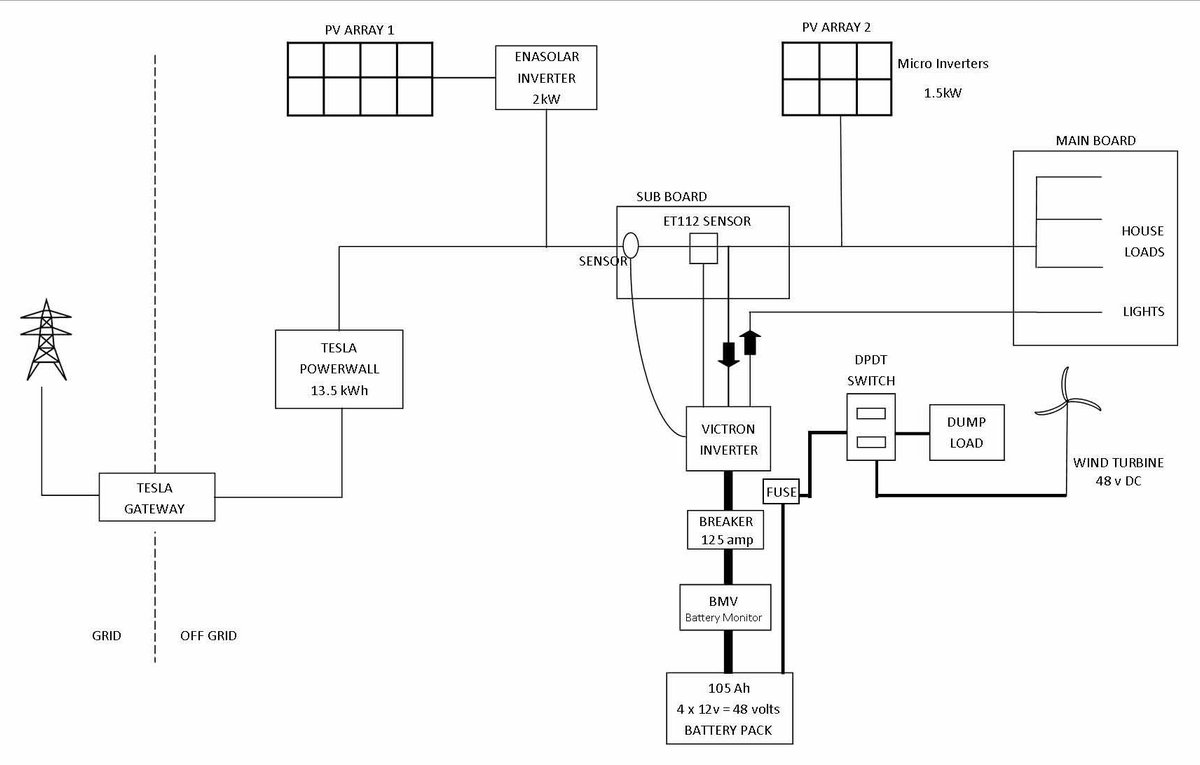
LAYOUT: To give you an idea, here is the layout for my system. Every setup is be likely to be different.
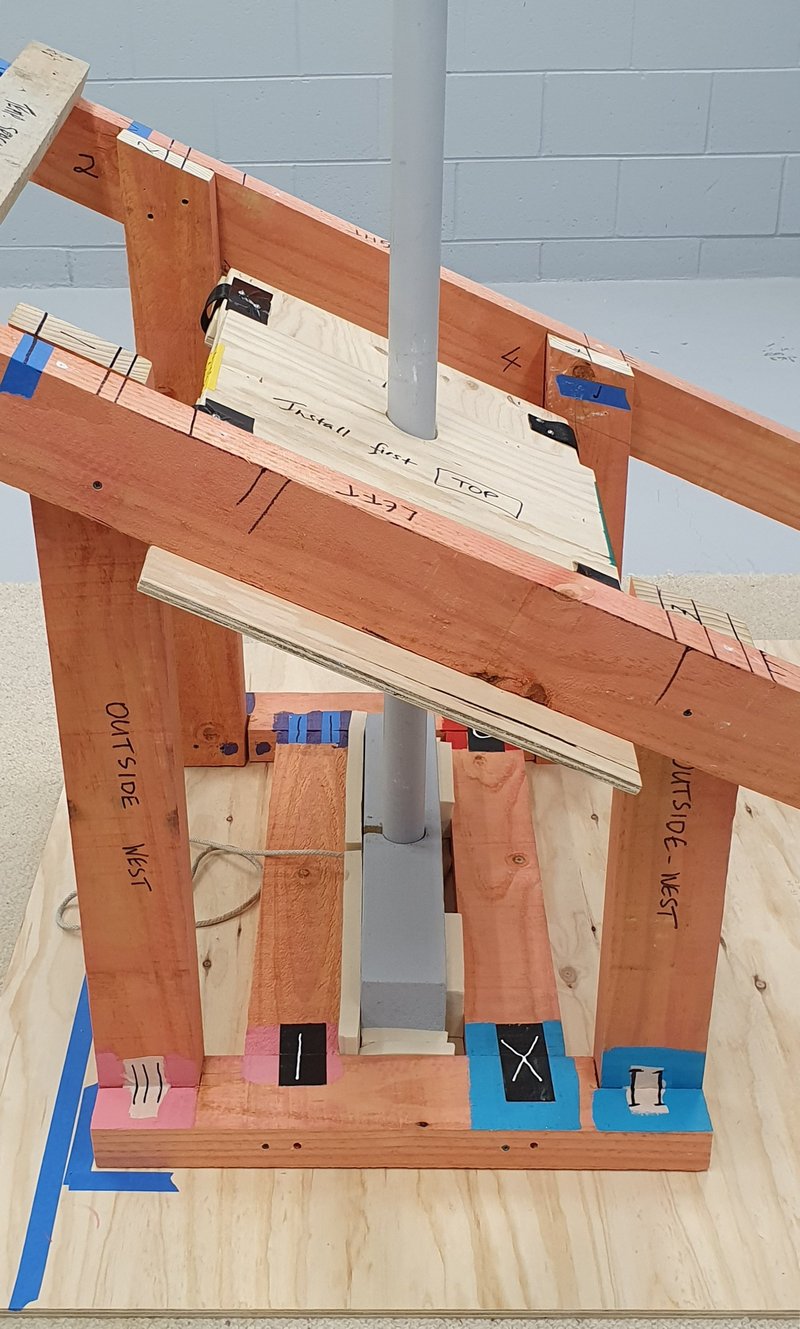
MOUNTING: A friend who does a lot of engineering work, help design a mount which I bolted to the rafters in my attic. Photo 163032. By mounting inside the roof, also meant there was only one hole in the roof, as the cabling passed through the vertical steel shaft. A flashing was used to seal the hole, - available from plumbing supplies.
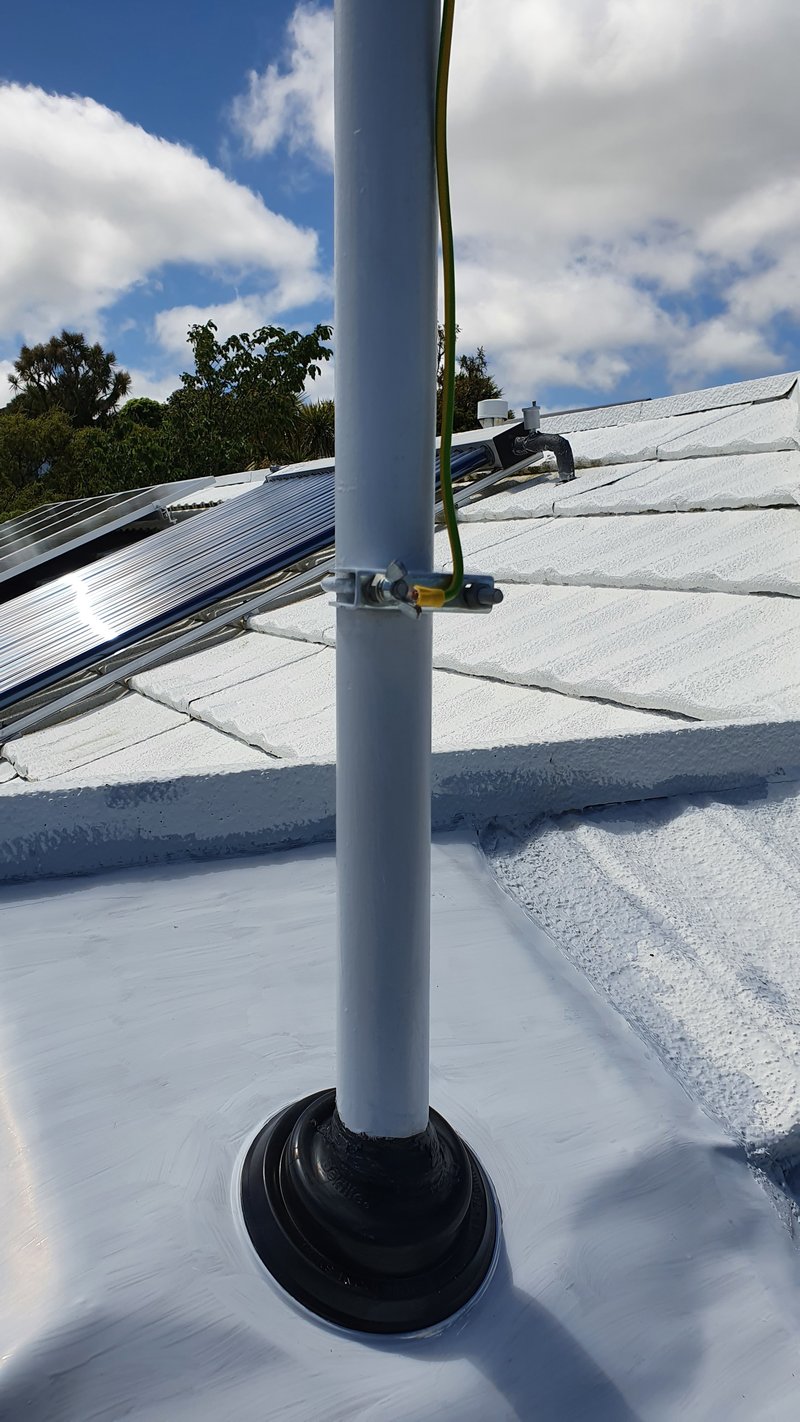
The biggest problem in mounting a turbine on your roof, is resonance. Noise from the turbine can be louder inside your house than out if you get this wrong. The turbine must be “soft mounted”, - this means no parts can be bolted directly between the turbine and house.
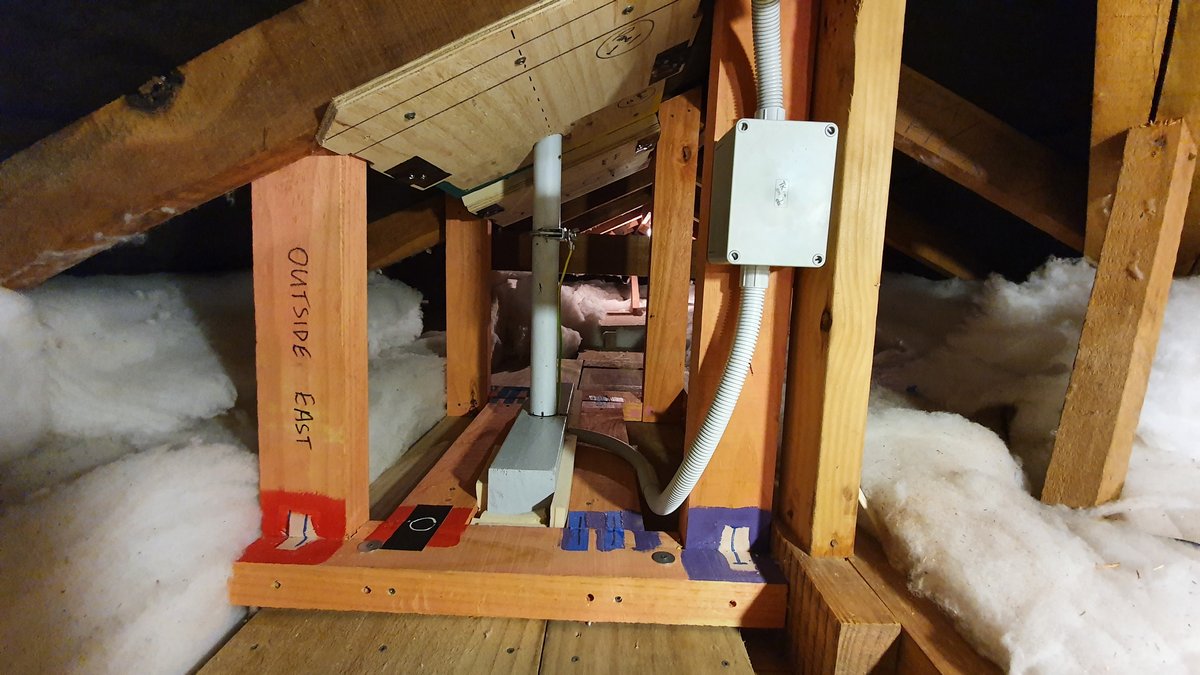
I made the mounts out of 12mm plywood plates, screwed together and separated by closed cell foam rubber bonded to the plywood. I made a mock up inside my workshop first.
This considerably reduced the noise and resonance inside the house.
COSTS: I have avoided mentioning costs as they change all the time, - you should do your own research.
However, to give you an idea, the turbine itself cost $NZ2,200.00. To estimate the total costs, allow for 3 – 4 times this amount. This includes the electrician's time, materials, batteries, shunt, inverter and engineer's time to design the mounting system.
I have not allowed for the professional audio recording costs in this estimate.
As with most things, the less you spend up front, the more you will spend later on.
BIRD-STRIKE: Another unknown was whether bird strike was going to be a problem. Commercial wind turbines in some areas have problems with bird strike because their turbines are situated on migratory birds' flight paths.
We have a lot of birds around our house, but over the last 5 years, only one sparrow has been killed. I think birds very quickly learn what dangers and obstacles there are in their 3D world and so it is not a major problem.
SUMMARY:
The good news is that the turbine is a lot quieter than anyone imagined, - Council is happy, neighbours are happy. The on-the-roof mounting works well and if you have the TV on, you cannot hear it unless there are abrupt wind changes.
The bad news, - as with any new technology, you have to be determined to follow the job through. There will always be “experts” who tell you it can't be done, or it will be too noisy, or you cannot mount a turbine on your roof. My research showed there was a fair amount of wind over our roof, but the turbine is putting out a fraction of the output the manufacturers claim. Jaycar replaced the turbine and it then worked as it should.
The problem with a turbine is you need to have the whole system assembled in a workshop situation and then try to check it works by using an electric drill to measure the output.
As far as output goes, it varies continuously. For accurate measurements you would need a DC clamp meter which has a logging function. Good luck in finding one of those!
Checklist:
- Change your entire house over to LED lighting first.
- Record weather station readings for a year in the same place as the proposed wind turbine.
- Talk to your local council. (Eco Advisor if they have one). Talk to your neighbours.
- Get Council permission to install a residential wind turbine.
- Find a suitable wind turbine and check they have technical support. Find a suitable inverter and check they have technical support.
- Buy the batteries, shunts, shut down switches, dump load etc.
- Contract an electrician to wire up all the parts on your workshop floor and test everything. Design and build the mounting system in your workshop.
- Mount the turbine on its pole through the roof and to the mount.
- Run the cabling conduit from the turbine down through your house to the inverter area.
- Contract your electrician to wire up all the parts. Install the blades on the turbine.
- Setup the software with an experienced installer. Wait for wind and test, test and test!
- Apply for final sign off from your Council.
Council Consent
For consent, The Hutt City Council work on three main criteria, under “Roof-mounted small scale wind turbines” (Rule 14L 2.1.3):
a. Shall comply with recession plane, yard and noise standards for the activity area in which the site is located.
The recession plane is a line drawn from 2.5 metres above your boundaries, at 45 degrees over your building. Your turbine may not protrude above this line.
The yard standard. What this means is that no building, inclusive of its cladding, can be closer than 1.0 metre from the side and rear property boundaries, or 3.0 metres from the front property boundary. This means that no part of a building (except for some exceptions, can be closer. Architectural drawings sometimes show measurements from the slab edge or building frame. However, in the case of resource consent drawings the dimensions need to be shown from the cladding, if they are not, the yard requirements may be breached
·Noise standards. This is catch 22! Most turbine manufacturers provide sound levels from their turbines in a rural area with little background noise. Residential areas, with close buildings, trees etc have a lot higher ambient levels compared to the turbine. Proving this gives you a better chance of getting a permit without having to apply for a resource consent. (If it is noisy for your neighbours, it will be very noisy mounted on your house!).
·To accurately measure noise levels, I had the option of extensive and expensive wind tunnel and field testing or -
Apply for a trial consent. I then employed an experienced sound engineer from Marshall Day acoustics in Wellington to mount sound recording equipment at my place and monitor ambient sound levels on my property for two weeks. This gave me a reference of standard noise levels at different wind speeds in a residential area. We then mounted the turbine on the roof and recorded sound levels over the following two weeks. As I have a weather station mounted in the same area, we could then directly compare noise levels with and without the turbine at different wind speeds.
b. May exceed the permitted height for the activity area by no more than 2m.
The permitted height from our driveway to the peak of our roof is 7 metres. This allows our 1.7 metre rotor span wind turbine to be up to 1 metre higher than our roof.
c. May not exceed more than one turbine per site.
Remember, Councils have difference requirements around New Zealand! Check with them first!!